The Page Editor is the main view that allows to add, arrange and edit contents on a page. Moreover, it provides access to all necessary user tasks like sitemap manipulation, publishing, and file attribute or property handling.
1 How to open the Page Editor
The Page Editor appears, when you preview a page in the Offline project.
2 The Editor's Toolbar
The toolbar can be toggled by clicking the ![]() colored edit point top-right, when browsing the offline preview of the webpage. The toolbar is docked on the window top and shows available options for editing the currently displayed page.
colored edit point top-right, when browsing the offline preview of the webpage. The toolbar is docked on the window top and shows available options for editing the currently displayed page.
Available Options
-
 Publish
Opens the publish dialog for publishing your changes.
-
 Clipboard
Opens the clipboard, where favorites and recent changes can be accessed.
-
 Add content
The "Add content" allows adding content to a page by drag & drop.
-
 Galleries
 Allows access to galleries, e.g., to upload pictures.
-
 Page Info
Allows to display information about the current page and its elements. If elements on the page have unpublished changes, the symbol is marked with a red dot.
-
 Edit point
 Clicking "Edit point" marks editable elements on the page with grey points. Clicking it again you can hide these grey points again.
-
 Context Menu
Shows the Context menu for the current page.
-
 Sitemap Editor
Switches to the sitemap editor.
3.1 Creating new content
Clicking the Add content opens the gallery dialog and shows a list of all possible content types that can be added to the current container page.
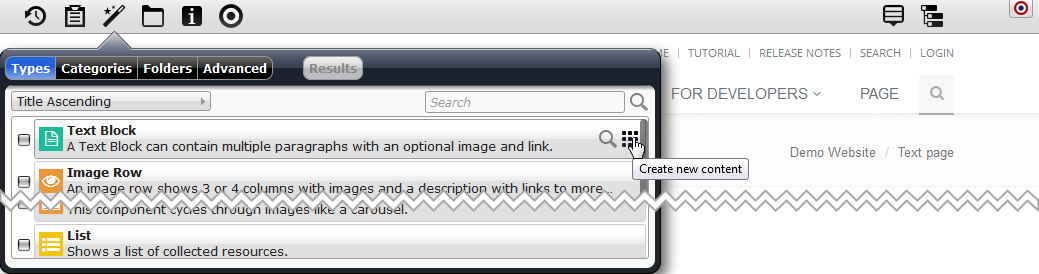
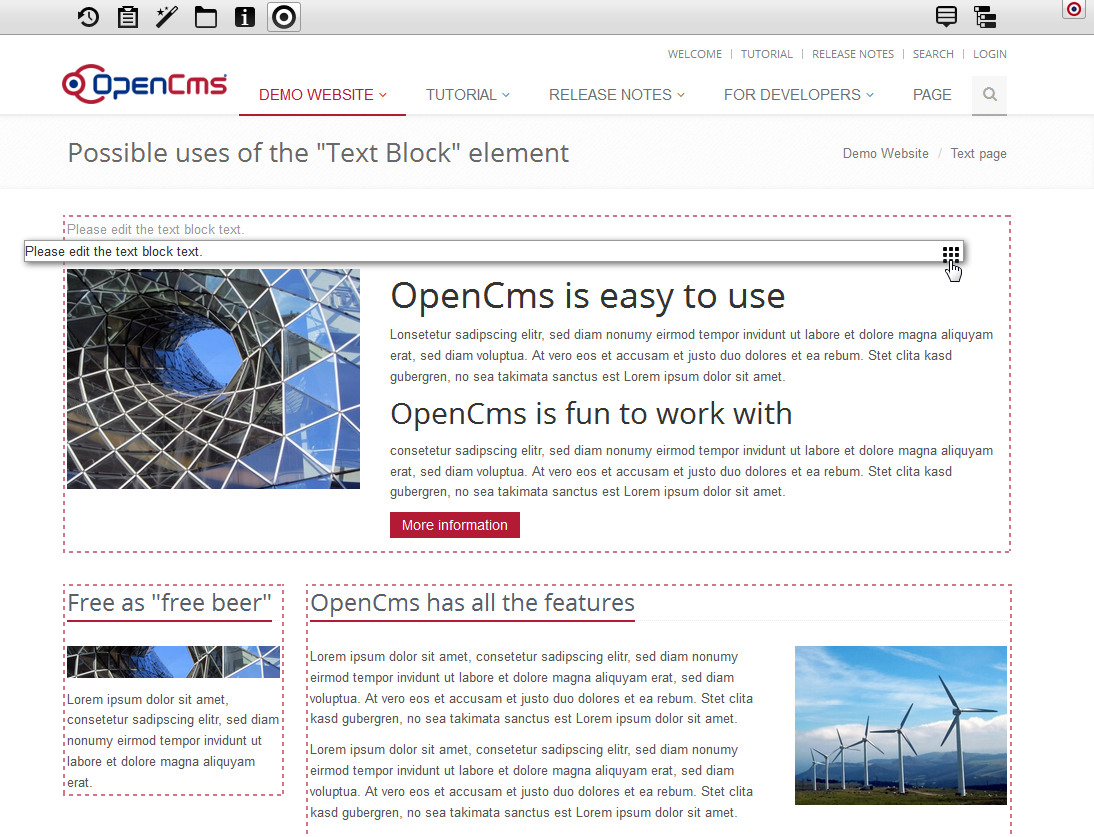
This dialog enables the content manager to create new content and also to retrieve existing contents. In order to create a new content, the preferred content type is dragged onto the page and a new instance of that type is created internally.
While dragging an element, all sections are highlighted where the element can be dropped:
3.2 Searching Existing Content
In order to reuse existing content, click on the Add content icon ![]() , select one or more resource types and click on the results tab. All elements displayed can be dragged onto the page. You can refine your search by selecting single or multiple criteria in each tab (Types, Galleries, Categories and Advanced). A click on the results tab will refresh the result list containing all contents matching your given criteria.
, select one or more resource types and click on the results tab. All elements displayed can be dragged onto the page. You can refine your search by selecting single or multiple criteria in each tab (Types, Galleries, Categories and Advanced). A click on the results tab will refresh the result list containing all contents matching your given criteria.
4 The Clipboard
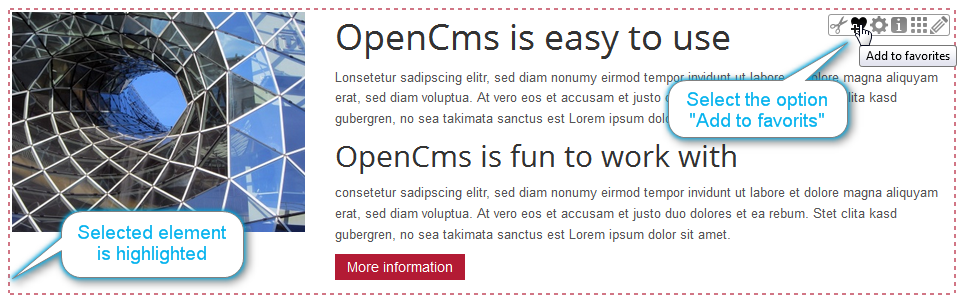
By clicking on the on the Clipboard icon in the toolbar you can access your personal favorites and a list of elements you have recently used. You can directly add content from the clipboard to your page by drag & drop.
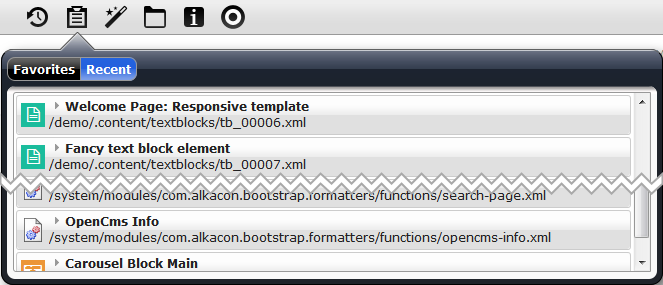
You can add a content element to your favorites by using the ![]() Add to favorites.
Add to favorites.
5 Context Menu
By selecting the Context menu icon from the toolbar you can select the following options.
Available Options
- Properties
Display and edit the OpenCms properties of the current container page.
- Page info
Show the elements used on the page, page attributes, like date created, date last modified, etc. and links to the page.
- Show in device
Allows to get previews of your page for different devices. The option is only available if a template context provider is used.
- Element view
Shows the available element views and allows to switch the element view.
- Undo changes
Recovers the last published version of the container page.
- Edit small elements
If elements that do not have a certain height edit points for these elements are only shown when this option is checked.
- Advanced > Availability
Opens the availability dialog.
- Advanced > Lock report
Lock state report of current container page.
- Advanced > Assign categories
Opens a dialog to assign categories to the current container page.
- Advanced > SEO options
Tweak Search Engine Optimization options.
- Advanced > Show workplace
Open the OpenCms workplace.
- Preferences
Opens a dialog to edit the user's preferences, e.g., workplace language, startup folder, ....
- Logout
Logout from the OpenCms workplace.
- About
Display information about your OpenCms installation.
5.1 Page info
The page info dialog shows additional metadata alongside some general information about the container page, including: the page’s title, its resource type, file size, resource state (new, changed, deleted, etc.) and the information about who and when the page was created. Moreover, it shows the last modification date and the project the page belongs to. The language and the permissions the current user has are display also.
Furthermore, you get information about the elements used on the page and the resources that link to the page.
5.2 Element view
Container page elements can be grouped in views by there type. If elements are not in the view you currently work in, edit points on the elements are hidden and also the Add wizard does not provide the option to add such elements.
The context menu option "Element view" is only shown if more than one such view is available (and non-empty concerning the available content types). Each user can also choose his default element view via the user preferences.
Here you can learn more about element view, in particular how to configure them.
5.3 Availability
By selecting the Availability option from the context menu you can set several options concerning the container page’s online visibility.
Available Options
- Publish scheduled date
Using the publish scheduled function, this page will be published automatically on the set date/time.
- Date released
By setting the release date, this page will be visible online from the chosen date / time on (if published).
- Date expired
By setting the expiration date, this page will be online (if published) until this date / time and the will disappear from the public website but still remains as resource in OpenCms.
Dates can be set by keyboard input or by using the calendar widget that appear, when the date field is clicked.
5.4 Lock report
The Lock report dialog displays the locking state for the current page. If the current page has been locked by another user you can retrieve information about the user and the according project here. This dialog is also able to consider inherited locks.
5.5 SEO options
This dialog offers a mask that enables the content manager to set the most relevant properties for SEO of a container page, meaning: Title, Description and Keywords. Additionally it is possible to define aliases for the page. As for rewrite rules you can choose between sending a temporary redirect (302 returned) or sending a permanent redirect (301) or just show the page (200). Already set aliases are displayed below. Learn more on SEO options here.
5.6 Show workplace
To open the OpenCms workplace in a new window, select the Show workplace option from the context menu. The OpenCms workplace features more advanced options to manage content and resources and offers a lot of administration options. The workplace should only be accessed by power users meaning administrators, developers or really advanced content managers.
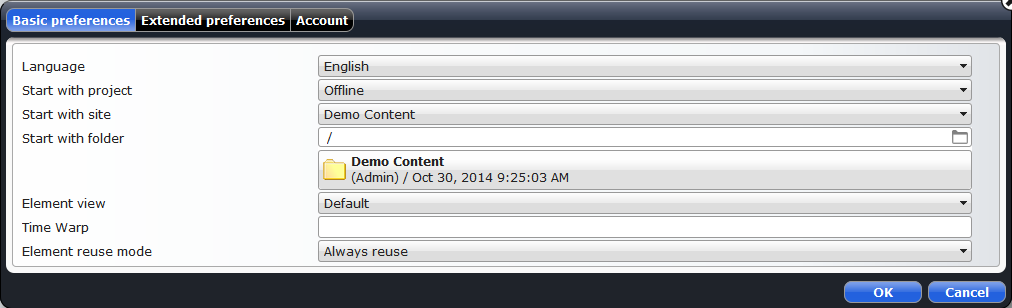
5.7 Preferences
Here you can adjust several OpenCms settings according to your needs. Usually it is sufficient to adjust settings in the "Basic preferences" tab and to use the "Account" tab to change your password.
The "Extended preferences" allow many more configurations - but most of them you may not need. Here you can get more information on how to configure the available preferences.