In OpenCms functionality or also content is encapsulated in modules. The default installation contains the modules for the core functionality and modules including demo content and functionality. If you add new functionality or resources, provide own XML content types or write your own templates and formatters it is recommended to encapsulate the new functionality into a well-structured set of modules. Also web pages can be encapsulated in modules to move them easily between different OpenCms installations. Modules can be created, imported, exported, cloned, configured and edited via the “Module Management” in the administration view of the workplace. Only in some rare cases manually touching configuration files is necessary.
1 The interface for module management
If you go to the workplace’s “Administration” view and click “Module Management” to get to the interface for module management.
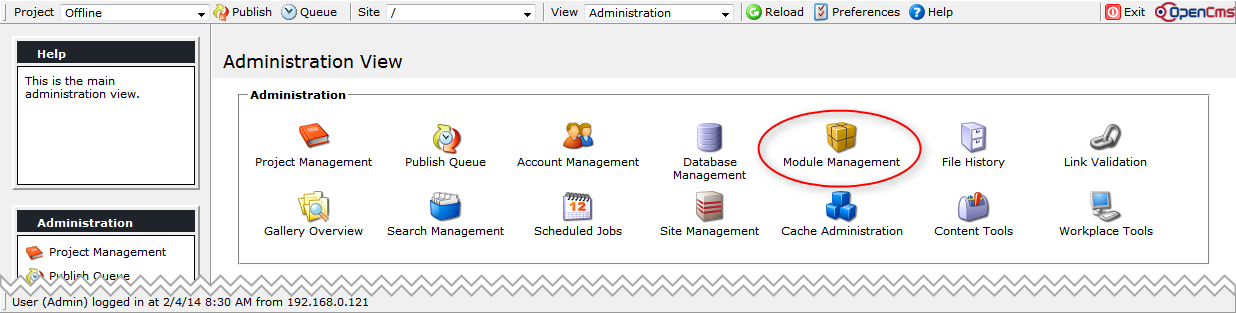
The module management’s main view looks as follows.

It allows you to create new modules or import modules already on the server or uploaded via HTTP. Furthermore, the list of all imported modules is shown. Modules from the searchable list can be edited, exported or deleted.
If you click on a module in the list, you get to a detail view of the module, providing various further module specific options:
- Edit module information
- Modify the module resources
- Modify the module parameters
- Clone the module
- Add a new resource type (content types only)
- Edit the module’s export points
- Edit the module dependencies
- Export the module
- Delete the module
Some of the different options for modules are described in the remainder this topic.
2 Cloning a module
Since OpenCms version 9.0.1 it is possible to clone modules. This is in particular helpful, if resources of an existing module should be reused in another context. For example, the demo modules shipped with OpenCms might provide content types or formatters that you want to reuse. In such a case, just clone the respective modules and adjust the “clones” to your needs.
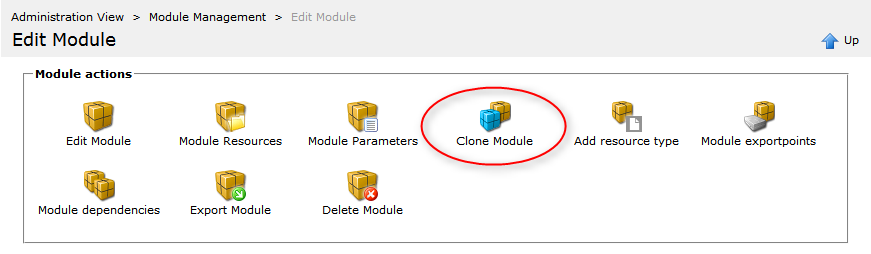
To clone a module, click “Module Management” in the “Administration”-view, select the module you want to clone by clicking on the module’s package name, and then click “Clone Module”.
The dialog for cloning allows you to enter module and author information for your clone. The package name has to be fixed here. All other information can be adjusted later by editing the module information.
The clone specific part of the dialog is “Translation options”. To really get the result you intend these options should be configured carefully.
The "Clone Module" dialogs translation options
- Prefix Substitution
Content types defined in XSDs are made available as resource types (and explorer types) with a unique name and ID in the opencms-modules.xml (the file is located in the RFS in the folder
WEB-INF/config/). The unique names are used for example in module and sitemap configurations. While new IDs for cloned types are chosen automatically, the unique names are adjusted via prefix substitution. If present, the given “Source prefix name” is removed from the original name of the resource type and afterwards the “Target prefix name” is prepended.- Formatter Substitution
Before OpenCms 9, formatters where configured in XSDs. If the formatters were part of the cloned module, or, if a module containing the original formatters has been cloned in advance, the URI to the formatters stored in the XSDs has to be adjusted. In particular, the module name in the path has to be updated. This is achieved by setting the “Formatter source” to the name of the module that contained the original formatters, and the “Formatter target” to the name of the module where the cloned formatters are located.
Note that formatter configs are not adjusted.
- Change contents to new resource types
XML contents contain a link to the XSD that defines their type. If the “Change contents to new resource types”-option is checked, in all contents of the currently selected site, these links are adjusted to refer to the cloned XSDs. Ensure that you select the appropriate site in the menu bar of the workplace.
- Change references in container pages
Container pages may contain references to resources that are part of the source module. For example, it could be referred to a dynamic function. Checking this option, links to such resources are redirected to the clones. The changes are performed for all container pages of the site selected when cloning. Ensure to select the appropriate site in the menu bar of the workplace.
- Apply changes to all sites
If checked, the currently selected site in the workplace is ignored and the changes in contents and container pages (if they should be performed at all) are applied in all sites.
3 Adding a new resource type
To make a content type defined in a module available in OpenCms it has to be configured as a resource type. The definition of the content type and its configuration as resource type had to be done manually up to OpenCms 9.0. Since OpenCms 9.0.1 the whole process is supported by a graphical interface in the workplace.
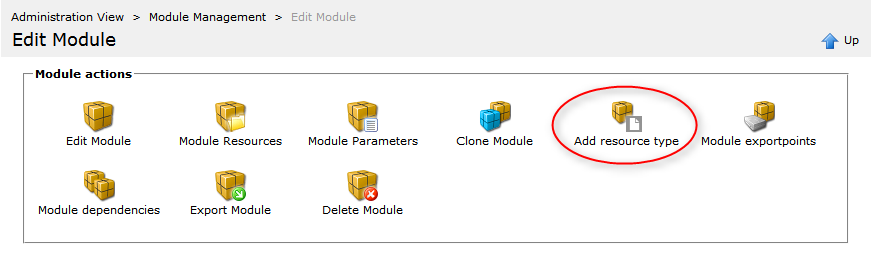
Go to “Module Management”, select the module where the content type should be added and click on the module name to get to the detail view of the module. Now, choose the option “Add resource type”.
A dialog appears where you can configure the new resource type. The following properties can be set:
Fields of the "Add resource type" dialog
- Name
The unique name of the resource type. The resource type is made available in OpenCms under that name. If a resource type with the given name already exists in the OpenCms installation, you get an error message and are asked to change the name.
- Type id
A natural number that is used as unique id of the resource type. If a resource with the same id already exists in the OpenCms installation, you get an error message and are asked to change the id.
- Label
The localized resource type label that is used for example in the “Add content”-dialog in the page editor (see here). The given label is set as value for the language specified by your current workplace locale at key
fileicon.<name>in the module’s.propertiesfile.- New dialog title
The localized resource type title used within the new resource dialog. It is set as value for the language specified by your current workplace locale at key
title.<name>in the module’s.propertiesfile.- Description
The localized resource type description that is used for example in the “Add content”-dialog in the page editor (see here). It is set as value for the language specified by your current workplace locale at the key
desc.<name>in the module’s.propertiesfile.- Schema type name
The name of the content type used in the XML Schema defintion. The type name must be unique in your OpenCms installation.
If you click “Ok” a content type is created and configured as resource type. In particular, the following actions are performed, where <name> is a placeholder for the resource type’s name and <module name> for the module that contains the resource type:
- In the subfolder
schemas/of the current module, the file<name>.xsdis created. The file defines a sample content type. - In the subfolder
formatters/of the current module, the file<name>-formatter.jspis created. The file defines a sample formatter for the content type.
Furthermore, a file<name>-formatter-config.xmlis created. It configures the created formatter JSP to be used for the created content type in any container. - In the subfolder
i18n/of the current module the file<module name>.propertiesis edited: The keysfileicon.<name>title.<name>desc.<name>
- In the folder
/system/workplace/resources/filetypes/the files<name>.pngand<name>_big.pngare created and export points for these files are configured. The files contain the default icons for the resource type. - The content type is added as resource type to the module configuration (file
.configin the module’s root folder). - The content type is configured as resource and explorer type in the file
opencms-modules.xml, located in the RFS in the folderWEB-INF/config/. - All files created in the VFS are added as module resources.
- All changes made in the VFS get published.
Click “Ok” if all actions have been performed successfully. If you return to the explorer view, please reload the web page to ensure that all new files are correctly displayed.
The newly available resource type can now be added to any container via drag & drop as any resource type available before. To personalize the created resource type you should:
- Alter the schema (
<name>.xsd). - Adjust the formatter and the formatter config (
<name>-formatter.jspand<name>-formatter-config.xml). - Replace the icons for the resource type with your own icons.
- Optionally, create and configure additional formatters.
- Optionally, add values for further languages to the respective keys in the .properties file.